How to schedule a meeting
Follow this step-by-step guide to schedule a meeting in KingsConference.
Access the Schedule Meeting Function
There are two ways to schedule a meeting in KingsConference: You can either click the 'Schedule Meeting' button in the left sidebar menu, or alternatively, click on a room tile (Video Room or Audio Room) from the home screen. Both options will allow you to start the scheduling process.
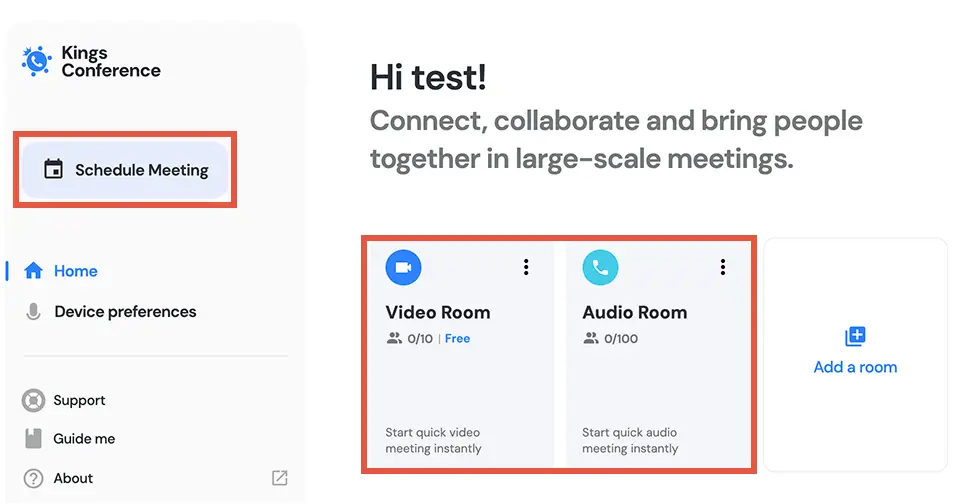
Select Room Type and Schedule Option
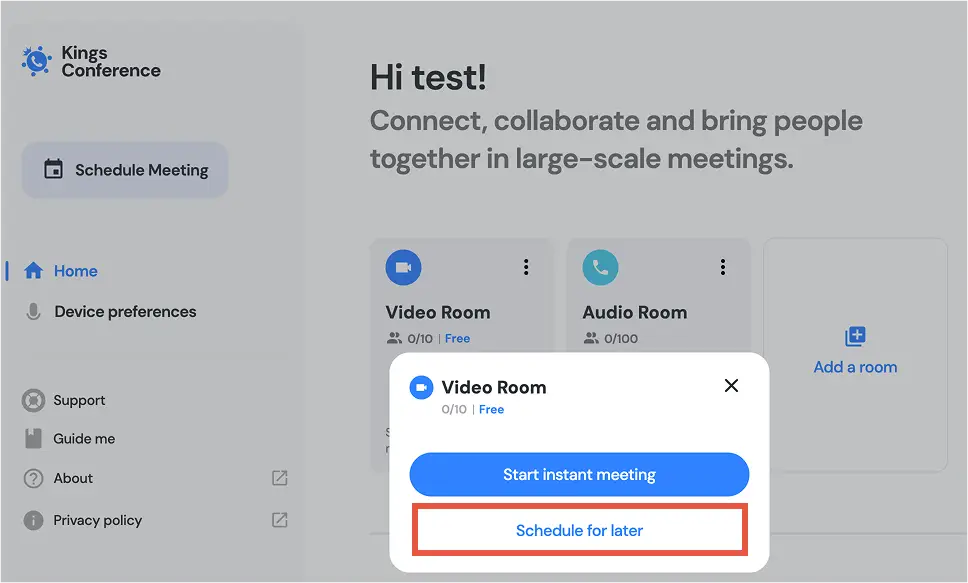
If you clicked on a room tile, a modal will appear - click the 'Schedule for later' button to enter the meeting details form.
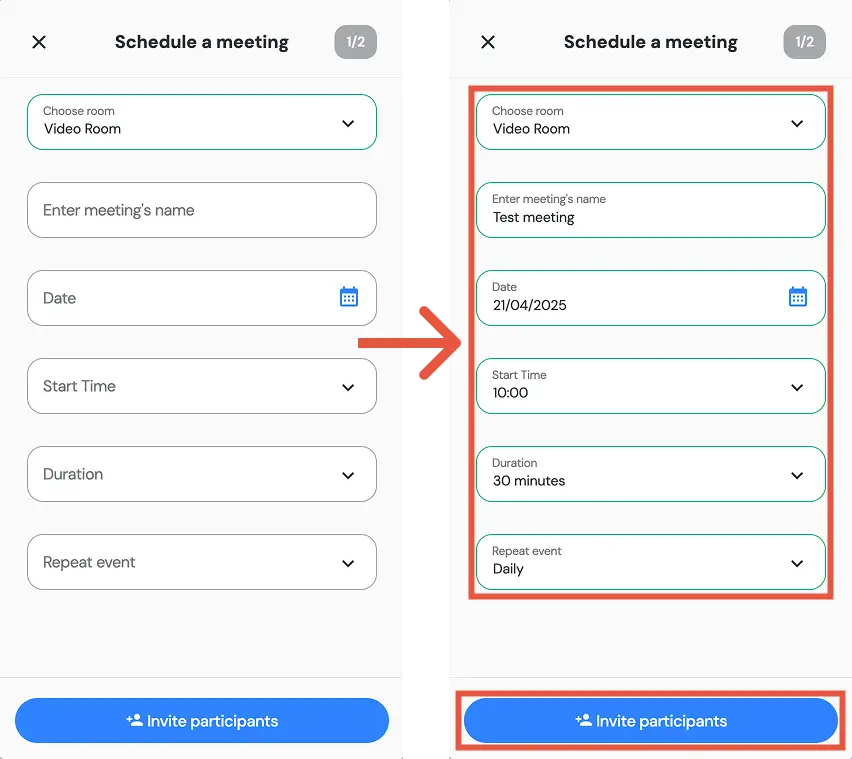
Fill in Meeting Details
Complete the meeting form by entering the required information: confirm your room type, add a meeting name, select the date, choose a start time, set the duration, and select a repeat frequency if needed. After filling out all details, click the 'Invite participants' button to proceed.
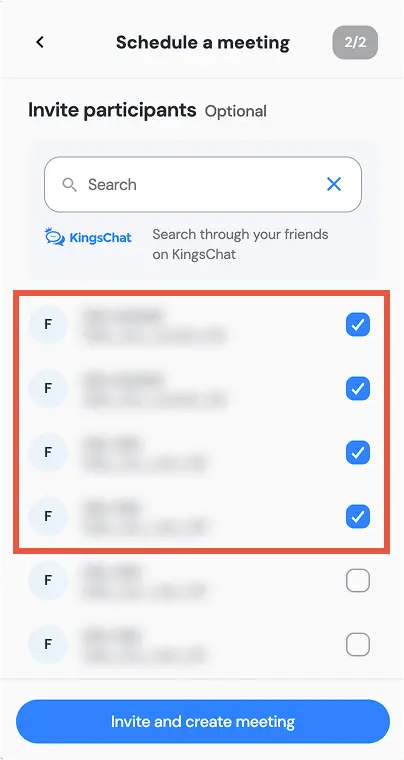
Invite Participants
On the participant invitation screen, use the search bar to find contacts or browse through your KingsChat friends. Select participants by checking the boxes next to their names. This step is optional - you can invite people later if needed. When you're finished, click the 'Invite and create meeting' button to finalize your scheduled meeting.
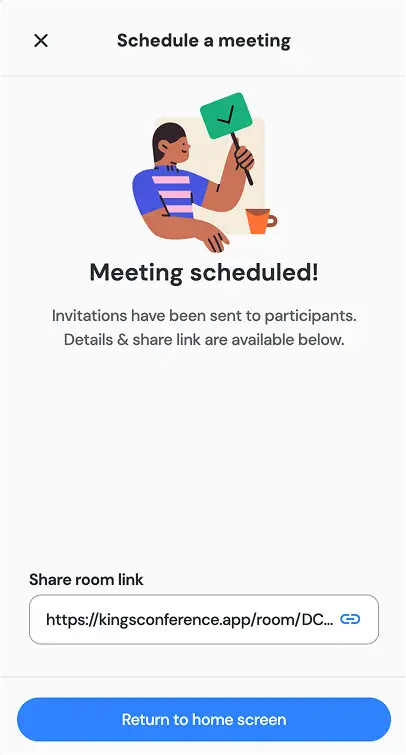
Confirm and Share Meeting
After successfully scheduling your meeting, you'll see a confirmation screen. Invitations are automatically sent to the participants you selected. You can copy and share the meeting link with others who weren't directly invited. Click 'Return to home screen' when you're done to exit the scheduling process.
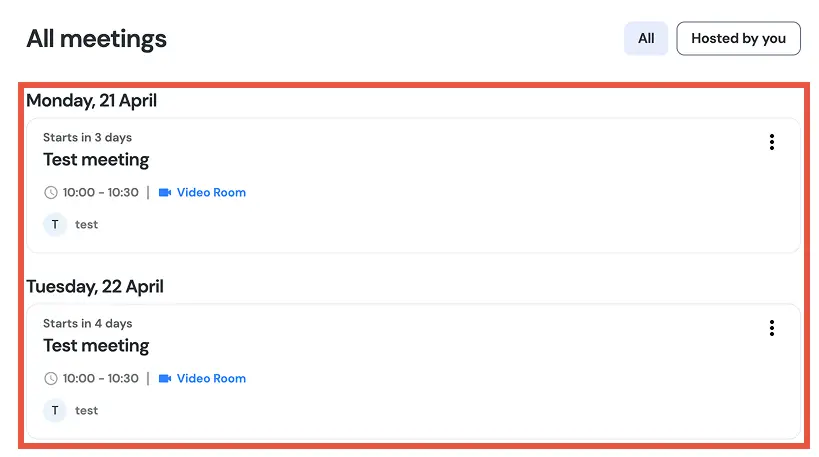
View Scheduled Meetings
Your scheduled meetings will appear in the 'All meetings' section, organized by date. You can see details such as start time, duration, room type, and participants. Toggle between 'All' and 'Hosted by you' tabs to filter meetings. Use the menu button (three dots) to access additional options for each meeting.